Maybe I have been working in the communications industry too long, but much of the usual telephone experience seems ridiculously antiquated to me. Using a string of digits as a user address? Anyone can call you for any reason they want whether I know them and want to speak to them or not? Of all of the telephony systems daily nuisances, I find conference calls to be the worst! The process of looking up a random string of digits to dial into a bridge, listen to the same repetitive prompts, and then needing to look up and enter another random string of digits drives me insane every time. I would prefer to just provide a user-friendly URL, like the chadwallacehart.com I own and to make my phone service available when I choose.
Also, a video option would be nice – sometimes. I like to do video calls with my parents so they can see my kids which means negotiating which video telephony service we will use first, usually via text message, based on who happens to be sitting in front of what device. Allowing multi-party video would be even better so I can let my kids have one camera to show off in the background and I can call in with another to have a real conversation.
There are many solutions out there for the problems above, but none of them allow me to “own” the solution and change it to fit my needs. Fortunately I know something about WebRTC and have rudimentary programming skills, so I set out to make my own phone service during the holiday break.
As I have mentioned in past posts, I do not get paid to code for a living and I do not ever plan to. Please treat my step-by-step (and sometimes step-by-misstep) log and commentary below as a rough guide as opposed to an exact instruction set to follow. If you just want to look at or copy the code, you can skip all this and just go to the ChadWallaceHart.com Github page here.
Pick a Signaling Server
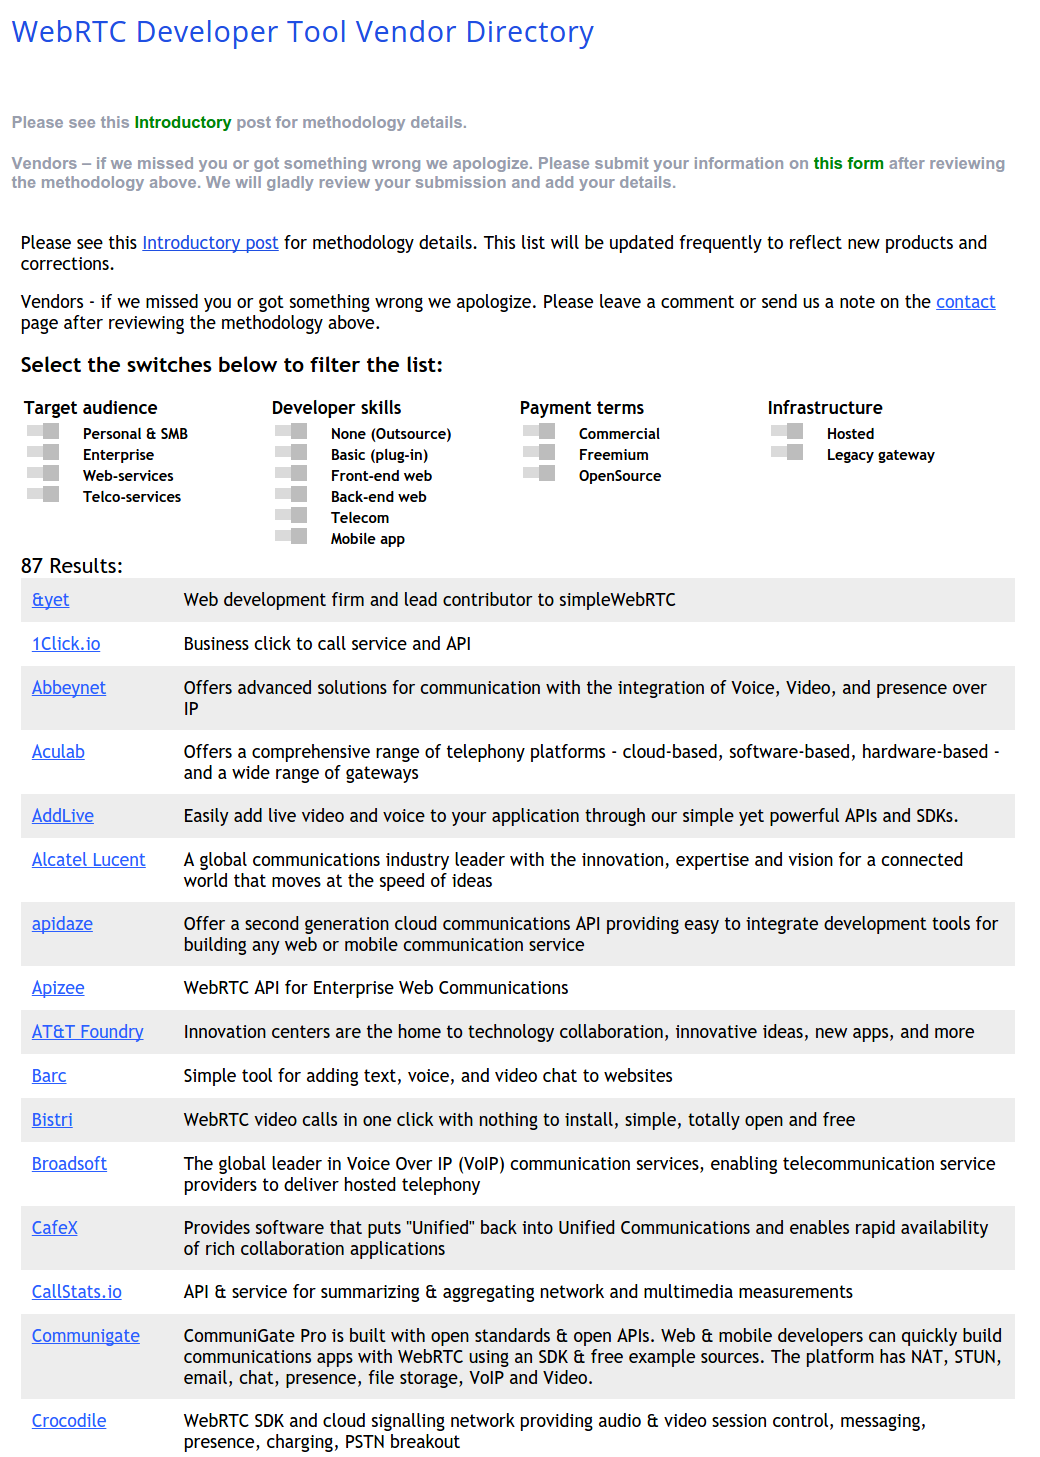
I have limited skills in node.js and I knew I did not want to code everything myself, so first I looked did some investigation of what server tools I wanted to use. If I had more confidence then I probably should have started with the design step I highlight below and then picked the right tool for my needs. There were 14 vendors in the Tool Directory as illustrated below and a bunch more that I should probably add to this list:
I decided to use Priologic’s EasyRTC Server largely because:
- It is totally open source
- The server comes with many reusable demos illustrating various call-flow scenarios
- They just released a NPM module for node with lots of documentation making it easy to get up and running
- I am somewhat familiar with the API based from my WebRTC Motion Detecting Baby Monitor (with the added bonus I could reuse the server for that project too)
#2 was really the most critical for me here since I had a lot of call flow scenarios in mind that I wanted to experiment with without having to do much coding. I encourage you to check out the others too since there is a wide variety of choices depending on how you like to code and what you are looking to do.
Service Design
Next I thought through how I wanted my phone service to work with a sketch:
Basically I want a basic presence system for myself to show when I am available and when I am not. I can do this simply with a means to log-in, log-out, and a waiting room. In most cases I prefer my real-time interactions to be scheduled, so I will log in when I know someone is going to call me and logout when I am done. For situations where my schedule is more flexible – i.e. call me this afternoon – I can just stay logged in. At this point I don’t need a means of authenticating callers into the system other than myself – I assume if you are visiting my site at a time when I happened to be logged-in that you are not randomly there to harass me.
Initial WebRTC tests
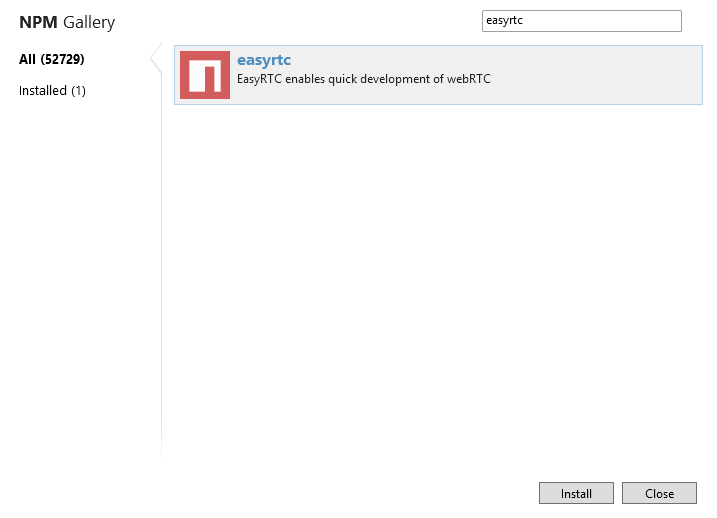
The documentation for setting up the EasyRTC server is very straight forward. I am using WebMatrix in Windows for my initial tests, so I just had to use their built-in NPM easyrtc module to add it:
From there I followed their instructions and copied their demo server.js and static directory and installed express and socket.io from NPM. That was all I needed to get up and running enough to check out their demos. I decided to start with a multi-party conferencing demo which has a HTML5 UI similiar to Priologic’s tawk.com to start.
|
1 2 3 4 5 6 7 8 9 10 11 12 13 14 15 16 17 18 19 20 |
// Load required modules var http = require("http"); // http server core module var express = require("express"); // web framework external module var io = require("socket.io"); // web socket external module var easyrtc = require("easyrtc"); // EasyRTC external module // Setup and configure Express http server. Expect a subfolder called "static" to be the web root. var httpApp = express(); httpApp.configure(function() { httpApp.use(express.static(__dirname + "/static/")); }); // Start Express http server on port 8080 var webServer = http.createServer(httpApp).listen(8080); // Start Socket.io so it attaches itself to Express server var socketServer = io.listen(webServer, {"log level":1}); // Start EasyRTC server var rtc = easyrtc.listen(httpApp, socketServer); |
server.js quick start from EasyRTC
The only trick I recommend for Windows users using WebMatrix is to run node directly from a command prompt instead of using WebMatrix’s built in hooks to Microsoft’s Internet Information Services (IIS) which is installed with WebMatrix. IIS did not seem to like port 8080 on my machine and it was faster to run dependently than mess with IIS . Also, my Windows setup is strictly for development – I will deploy on Ubuntu.
Basic node.js Setup
Now that demonstrated that the WebRTC part would be straight forward to copy from the EasyRTC demos, I decided to frame out the rest of the logic in node.js. I made a brief attempt to use Jade to help dynamically serve the pages I would need, but after spending some time I on it I concluded this was not worth the effort for the initial prototype. Here is how my basic setup looked-
My main server.js file:
|
1 2 3 4 5 6 7 8 9 10 11 12 13 14 15 16 17 18 19 20 21 22 23 24 25 26 27 28 29 30 31 32 33 34 35 36 37 38 39 40 41 42 43 44 45 46 47 48 49 50 51 52 53 54 55 56 57 58 59 60 61 62 63 64 65 66 67 68 69 70 71 72 73 74 75 76 77 78 79 80 81 82 83 |
//Use Express module var express = require('express'); var app = express(); // Needed to parse form data app.use(express.bodyParser()); //global variables var loggedIn = false, password = 'password'; //Temporary home page app.get('/', function (req, res) { res.send("Welcome"); }); //Serve a static login page if not logged in already app.get('/login', function (req, res) { console.log('Login attempt'); if (loggedIn == true) { res.send("Already logged in."); } else { res.sendfile(__dirname + '/public/login.html') } }); //Respond to POST from login form app.post('/login', function (req, res) { console.log('post to /login'); if (loggedIn == true) { res.send("Already logged in."); } else { console.log("Posted data:" + JSON.stringify(req.body)); if (req.body.pw == password) { loggedIn = true; res.send("You are logged in."); } else{res.send("Incorrect password.")} } }); //Serve a static logout page app.get('/logout', function (req, res) { res.sendfile(__dirname + '/public/logout.html'); }); app.post('/logout', function (req, res) { console.log("Posted data:" + JSON.stringify(req.body)); if (req.body.pw == password) { if (loggedIn == true) { loggedIn = false; res.send("Logged out"); console.log("logged out"); //Consider killing all active sessions here easyrtc.setOption('apiEnable', 'false'); } else { res.send("You were already logged out"); console.log("Attempt to logout when not logged in"); } } else { console.log("Bad password attempt"); res.send("Incorrect password"); } }) //Initiate a call app.get('/call', function(req, res){ if (loggedIn == true) { res.send("Starting call"); } else { res.send("Chad is not available. Please try later.") } }); // Start server on port 8080 app.listen(8080); console.log('Listening on port ' + 8080); |
And here is the similar looking logout.html:
|
1 2 3 4 5 6 7 8 9 10 11 12 13 14 15 16 17 18 19 20 21 22 23 24 25 26 27 28 29 30 |
<!DOCTYPE html> <html lang="en"> <head> <meta charset="utf-8" /> <title>Log out of chadwallacehart.com</title> </head> <body> <form action=""> password: <input type="password" name="pass"> <input type="submit" value="Logout"> </form> <script src="//ajax.googleapis.com/ajax/libs/jquery/1.10.2/jquery.min.js"></script> <script> $(document).ready(function () { $("form").submit(function () { console.log("password sumbitted"); var pw = { "pw": $("input").val() }; $.post("/logout", pw, function (response, status) { //console.log("PW:" + JSON.stringify(pw.pw) + "\nstatus:" + status); if (response) {alert("stop!")} $("body").text(response); console.log(JSON.stringify(response)); } ); }); }); </script> </body> </html> |
It took me several iterations to get to this point. I am not a real web programmer, so the hardest part for me was figuring out how to use AJAX to correctly pass a JSON object to from login.html/logout.html to the server and handling a response message. The rest was thinking through and validating my authentication logic.
Adding in WebRTC
The WebRTC part was easy after I figured out how to properly serve static files with node. First I had to add the other required modules – I installed from NPM and add the the following to the initial module section:
|
1 2 |
var io = require("socket.io"); // web socket external module var easyrtc = require("easyrtc"); // EasyRTC external module |
I struggled the most figuring out how to serving all the files associated with my static files. I did not want to make all my my content statically available. First I copied the demo files and the associated css, images, and js directories into a new easyrtc folder off the base of my project directory. Then I used node to serve my html files but kept the other files publicly accessible. The most important part here was using the app.use command to tell node to substitute any /js, /image, and /css references with the easyrtc sub-directories I copied:
|
1 2 3 4 |
//Statically serve files in these directories app.use("/js", express.static(__dirname + '/easyrtc/js')); app.use("/images", express.static(__dirname + '/easyrtc/images')); app.use("/css", express.static(__dirname + '/easyrtc/css')); |
Then I altered my login logic to launch the EasyRTC server. After the first successful login the static demo_multiparty.html is served if the password matches and my global loggedIn variable is set to true. After that, and whenever loggedIn is TRUE, the demo_multiparty.html page is served when the login URL is accessed. [Warning: sending plain-text passwords over an unencrypted connection is not advised!]
|
1 2 3 4 5 6 7 8 9 10 11 12 13 14 15 16 17 18 19 20 21 22 23 24 25 26 27 28 29 30 |
//Serve a static login page if not logged in already app.get('/login', function (req, res) { console.log('Login attempt'); if (loggedIn == true) { res.sendfile(__dirname + '/easyrtc/demo_multiparty.html'); } else { res.sendfile(__dirname + '/public/login.html'); } }); //Respond to POST from login form app.post('/login', function (req, res) { if (loggedIn == true) { res.send("Already logged in."); } else { console.log("Posted data:" + JSON.stringify(req.body)); if (req.body.pw == password) { loggedIn = true; res.send("logged in"); console.log("Logged in"); // Start EasyRTC server var easyrtcServer = easyrtc.listen(app, socketServer); } else { res.send("Incorrect password.") } } }); |
To make this work with the minimal amount of conditions, I had to setup my login.html to refresh the page when it received a “logged in” result from the server. When the ‘ \login’ url is called, node will recognize I am logged in and serve the demo_multiparty.html file.
Then I had to update my ‘/call’ code to serve the same file:
|
1 2 3 4 5 6 7 8 9 |
//Initiate a call app.get('/call', function(req, res){ if (loggedIn == true) { res.sendfile(__dirname + '/easyrtc/demo_multiparty.html'); } else { res.send("Chad is not available. Please try later.") } }); |
The last step to getting WebRTC to work was starting socket.io:
|
1 2 |
// Start Socket.io so it attaches itself to Express server var socketServer = io.listen(webServer); |
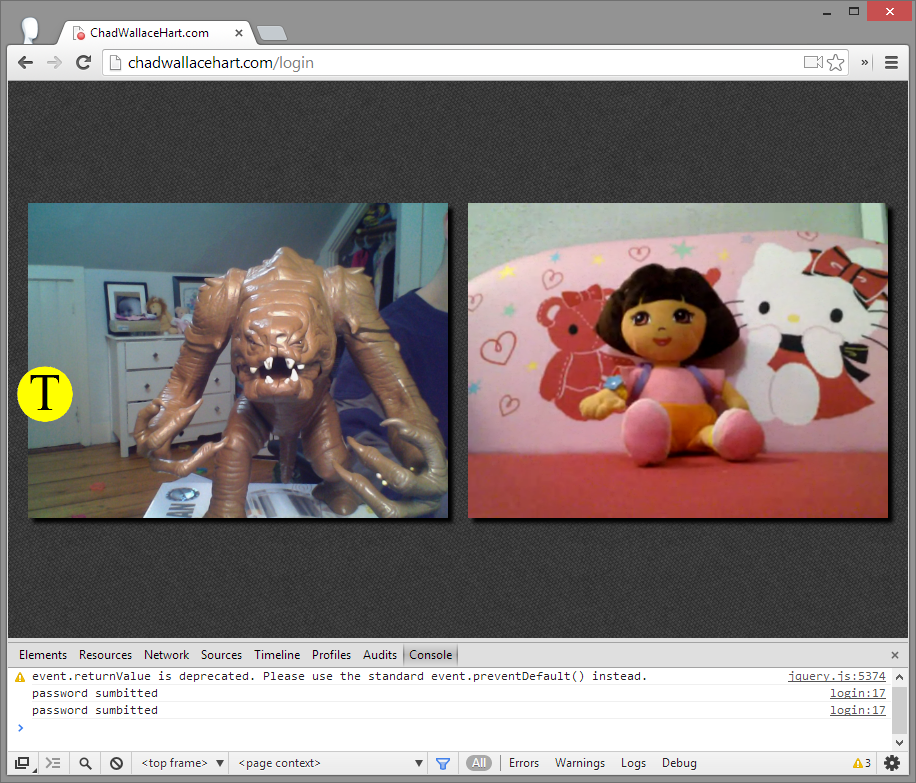
Then I did some tests to make sure everything worked. It did:
Preparing for External Deployment
EasyRTC comes with access to all of their API’s turned off by default. As they cover in their documentation, this is easy to change – just make a few tweaks to the /node_modules/easy_rtc/lib/easyrtc_default_options.js file:
|
1 2 |
option.apiEnable = false; option.demosEnable = false; |
I also needed to change the node server port from 8080 to 80 – the default HTTP port:
|
1 |
var webServer = app.listen(process.env.port || 80); //process.env.port assigned by WebMatrix |
I also changed my password in server.js.
Deployment
I had an existing Amazon Web Services (AWS) EC2 instance setup already from a past project, so I decided to reuse this. The steps to set this up are relatively straight forward:
- Setup an AWS account. If you do not have an AWS account, bitnami (see below) has documentation on this here.
- Setup an Ubuntu instance. Go to the AWS market place to get a preconfigured Ubuntu instance with node.js already installed. I used this one from bitnami – the software is free but you may have to pay for the EC2 instance. When I first signed up I got a Standard Micro instance trial for free for a year. My 1 year trial expired so now my total costs for running an EC2 micro instance are now a little more than $15/month if I keep it up all the time.
- Get remote access to your instance. I did this a long time ago and did not take great notes, but bitnami has documentation on this too here. I used putty for terminal access and WinSCP to transfer files.
- Copy your files over. I stuck mine in /srv/www which was the default Apache/tomcat folder
- Lauch node.js – if you follow my setup above, navigate to the /srv/www from your terminal window and typing node server.js. When I first did this I got a EAADDRINUSE error. This is because bitnami has the instance setup to run node behind Apache. There is a bunch of configuration you can do to make this work, but I found it easiest to just turn off Apache since I do not need any of its features at this point. To do this just type this first:
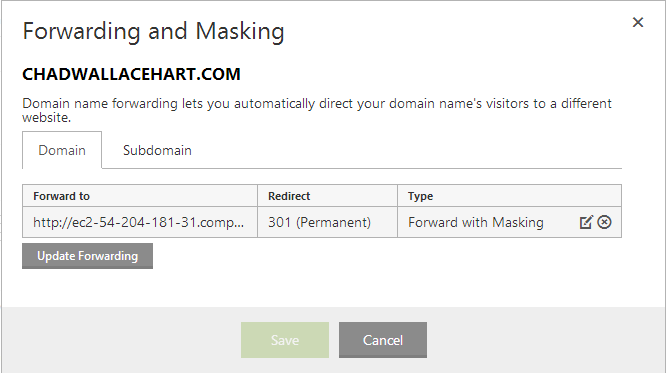
1sudo /opt/bitnami/ctlscript.sh stop apache - Forward your domain over to AWS. Lastly I changed my domain forwarding in my domain hosting provider to point to my AWS instance:
- Make everything work automatically in the background. I don’t want to have to log in and plug in all these commands anytime the server should stop. I also installed another tool in node’s NPM directory- forever.js to easily make node run continuously as a background process:
1sudo forever start server.js
The problem with this is that forever and node will not automatically restart if the instance is stopped or rebooted. I found this post that describes how to setup a cronjob to address this problem. First do:
1$ crontab -u testuser -eThen I added:
1@reboot /usr/bin/sudo /srv/www/node_modules/forever/bin/forever start /www/srv/server.jsI did a reboot and everything restarted fine.
It Works!
I tried it across several of my devices on my LAN and over LTE with no problems. That night instead of asking my parents if they wanted to talk over Facetime or Skype, I told them to use Firefox (they think Google is spying on them and won’t use Chrome) to visit ChadWallaceHart.com. I went to http://chadwallacehart.com/login, logged in. They called in and the session started. Despite my repeated attempts to explain some of the things going on in my industry, they were extremely impressed to that I somehow “created my own Skype”. It is good to see there are some WebRTC fans outside of the communications industry :).
I did some further stress tests by adding more streams into the mix with variable results (for future posts).
Whats Next?
This was a great prototype that solved my video calling pain point, but it is far from production ready. Here are a few things I need to work on:
A Proper Homepage
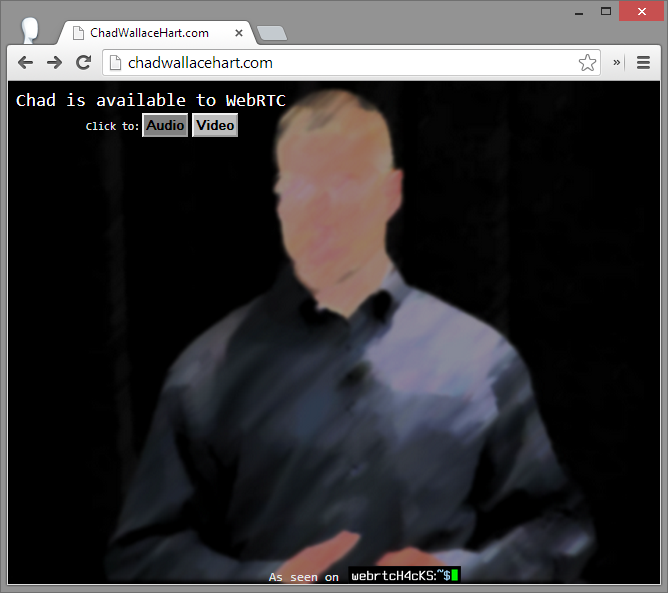
A couple of days later I managed to figure out Jade enough to piece together a basic homepage that shows my availability:
Audio Calling
I could easily plug-in one of EasyRTC’s demos for an audio-only option here but I think I would like to setup my own audio calling interface myself for a future project.
Security & Authentication
Security was not a major consideration in my setup since I am not working with any sensitive user information. My main concern is having someone run-up my AWS bill without my knowledge. I do have frequent alerts setup on my AWS account to see if anything unusual is happening. There are several minimal things that I should improve since I am sending my passwords in clear text. Getting a TLS certificate and using HTTPS and WSS would be better. Saving a hashed version of the password on the sever instead of having it stored in server.js would also be nice. Using OAuth to or OpenID check credentials against one of my other accounts could also be interesting.
I am sure there are other things I should be worried about too. In reading through this prior to posting I wish I spent more time on these security aspects. We will see how often I actually keep the instance running until I address some of the security implications.
Other ideas
- Alerting – this is setup assumes I will patiently wait for someone to join my conference at a designated time. In reality I am not likely to wait too long – some kind of audio or visual alert when someone arrives would be nice to implement too.
- Caching login information – it would be nice to save this in a cookie
- Hang-up when I leave – right now the bridge stays open when I leave. There might be times I want it to stop for everyone after I leave.
- Browser identification – it would be nice to tell my visitors they have to use a WebRTC supporting browser or find another way to reach me
- Native mobile app support – that was actually my original plan for this post, that that is another story
I am sure I will think of more as I use this more often.
Show Me the Code
You can find my latest source and changes on Github here. Please let me know your comments and suggestions.
Final Thoughts
This was definitely not the quickest way to build a WebRTC conference room. If I had an existing website and wanted to add a basic WebRTC-based conference room to it, it would have been better to do this with plug-ins or embedded iframes. That would have been a pretty boring post though (for those of you who actually made it this far at least).
Also, I realized I did not write one single line of code that looked anything like getUserMedia() or createPeerConnection() during this entire project (not yet at least). For most developers that may actually be a good sign. This project certainly demonstrates the relative ease (or lack of skills required) in which WebRTC can be added to a website, thanks to third party libraries and frameworks like EasyRTC that are built on top of the W3C WebRTC APIs.
I look forward to talking to you, on my terms, using ChadWallaceHart.com.





Hello Chad – I am not even close to your expertize in coding. Forgot coding many years ago 🙂 However read your block and understood you are using your own Web/Signalling Server using socket.io. What about NAT servers? Are you using public ones or have your own or that provided by others/EASYRTC?
EasyRTC uses socket.io, so that is where that reference is from. I also used easyRTC’s default STUN servers:
option.appIceServers = [ // Array of STUN and TURN servers. By default there is only publicly available STUN servers.{url: "stun:stun.l.google.com:19302"},
{url: "stun:stun.sipgate.net"},
{url: "stun:217.10.68.152"},
{url: "stun:stun.sipgate.net:10000"},
{url: "stun:217.10.68.152:10000"}
];
Adding a TURN server into the mix is something I would like to do in a future project.
Nice post Chad. An easy way to provide some basic security is with iptables, Linux built in firewall. For now, you could just use a whitelist of good IP addresses.
Thanks Jim. I could definitely do that for the machines I know I will be using and my work domain. The challenge is almost device I use has a dynamic IP. I have been inviting others outside of my immediate family to the site so getting their IP addresses is difficult. If you have ideas on how to address that then please share!
Nice, very nice indeed.
I like the idea, especially in this time of NSA (et. al.) snooping on all our communications.
How about some strong encryption?
The peer-to-peer media sessions are using WebRTC’s mandated DTLS encryption, but I agree I should absolutely encrypt the signaling communications. I need to look into how to force Secure Web Sockets on socket.io (used by EasyRTC) and I should use a secure mechanism to pass my login password to the server or use HTTPS.
I just implemented https with my EasyRTC server. It was very easy and straight forward. Dont forget about the SSL Certs….
http://www.easyrtc.com/docs/guides/easyrtc_server_ssl.html
// Load required modules
var https = require(“https”); // https server core module
var fs = require(“fs”); // file system core module
var express = require(“express”); // web framework external module
var io = require(“socket.io”); // web socket external module
var easyrtc = require(“easyrtc”); // EasyRTC external module
// Setup and configure Express http server. Expect a subfolder called “static” to be the web root.
var httpApp = express();
httpApp.configure(function() {
httpApp.use(express.static(__dirname + “/static/”));
});
// Start Express https server on port 443
var webServer = https.createServer(
{
key: fs.readFileSync(“/pathtokeys/domain.key”),
cert: fs.readFileSync(“/pathtokeys/domain.crt”)
},
httpApp).listen(443);
// Start Socket.io so it attaches itself to Express server
var socketServer = io.listen(webServer, {“log level”:1});
// Start EasyRTC server
var rtc = easyrtc.listen(httpApp, socketServer);
Chad,
Thank you for taking time to share your knowledge and code with the community. I downloaded your source code and am able to get the code to run. I can login and logout, however, when I attempt to login again I get the following error messages:
Authentication failed. Socket will be disconnected.Lost connection to signaling server.
Do you have any idea how to resolve these issues?
I have not looked at this code in a while (I have an update on this on my to do list). It sounds like you may be having problems when calling “easyrtcServer = easyrtc.listen(app, socketServer);” for the second time. I would run the client in a debugger to verify where this is happening and check to see what it says on the server side. I would also recommend going to EasyRTC’s message board to see if they have anything to say about it – something may have changed on their end in the last 14 months since I wrote this.
very nice post
Hi Chad, its really Well organized and i will try to implement this.
But i was wondering will WebRTC work with http/2 to improve the speed and the audio/Video Quality? because i never seen anyone use this with newly released protocols like SPDY and HTTP/2 .
thanks
I cannot comment specifically on SPDY & HTTP/2, but the QUIC protocol has been coming up as mechanism that could help with latency and congestion control for the WebRTC datachannel. One of Google’s engineers, Ian Swett talked about this earlier this year: slides – https://docs.google.com/presentation/d/1uFH2NhFrTegqhlVtxis1MU9Expw8syzjwcZJjv6bHQE/edit; video – https://youtu.be/mIvyOFu1c1Q. Tsahi also did a post on QUIC in WebRTC at bloggeek.me.
Good demo. To run with android devices https is required, I added the first 2 and changed the last lines:
var https = require(“https”); // https server core module
var fs = require(“fs”); // file system core module
—————————————————————–
var webServer = https.createServer(
{
key: fs.readFileSync(“/@nico/@c/easyrtcserver/server.key”),
cert: fs.readFileSync(“/@nico/@c/easyrtcserver/server.crt”)
},
app).listen(8443);
//var webServer = app.listen(process.env.port || 8080); //original WebMatrix port
//var webServer = app.listen(8080);
console.log(‘Listening on port ‘ + 8443);
// Start Socket.io so it attaches itself to Express server
var socketServer = io.listen(webServer);
Hi Chad,
First of all, great article!
Second: I just git clone your project into a EC2 virtual machine, and I was able just to see my own camera, in both sides.
Am I missing something?
I used Bitnami Node.js ready machine, and redirected port 80 to 8080.
Regards,
Sandro Wiggers
Thank you for the decent explanation but sorry for this newbie’s question, how do I build the project after I download the zip from git?
Thank you very much, Sir.
Greetings,
I have been playing around with this script (great post and work BTW) and I have it seemingly working fine when using Chrome browser…however when I use FireFox I get the following message “Requested video size of 640×480 but got size of 0x0″…?
Has anybody experienced this…? Workaround? Thank you in advance. Regards.
I just took a look and I cannot get the EasyRTC demos to do getUserMedia on Firefox either. It looks like others have the same issue: https://groups.google.com/forum/#!searchin/easyrtc/firefox%7Csort:date/easyrtc/1YXI_LIwBew/igPMhNhNAwAJ
I would add-on there.
I suspect this is because of Firefox’s switch to navigator.mediaDevices.getUserMedia – I bet the EasyRTC code needs to be updated (or shimmed with adapter.js)
Hi,
Beautiful explanation and I could build a one to one call in no time. Needed to know how many clients can connect in one time in a session using easyrtc
easyrtc uses a peer-to-peer mesh architecture for handling multiple parties on a call (not a SFU: https://webrtchacks.com/tag/sfu/). p2p mesh, assuming video and depending on the configuration, can usually handle 4-8 users before it starts to cause issues.